12 Oct 2017

Ansible Tower to reach the next automation level – Installation

Ansible is an open source automation platform. It is very powerful, it is agentless and can help you with configuration management, application deployment, task automation, Provisioning, Continuous Delivery, Security and Compliance and Orchestration.


From: https://cdn.edureka.co/blog/wp-content/uploads/2016/12/Nasa-Case-Study-What-Is-Ansible-Edureka.png

From: https://cdn.edureka.co/blog/wp-content/uploads/2016/12/Nasa-Case-Study-What-Is-Ansible-Edureka.png


Ansible Tower

In other hand, Ansible Tower is a REST API, web service, and web-based console designed to make Ansible usable for IT teams. It is a hub for automation tasks. Tower is a commercial product supported by Red Hat, Inc. Ansible, Inc. (originally AnsibleWorks, Inc.) was the company set up to commercially support and sponsor Ansible and Ansible Tower, Red Hat acquired Ansible in October 2015.


From Ansible:

“Ansible Tower is the easy-to-use UI and dashboard and REST API for Ansible. Centralize your Ansible infrastructure from a modern UI, featuring role-based access control, job scheduling, and graphical inventory management. Tower’s REST API and CLI make it easy to embed Tower into existing tools and processes. Tower now includes real-time output of playbook runs, an all-new dashboard and expanded out-of-the-box cloud support.”


From: https://www.redhat.com/cms/managed-files/ansible-diagram-3.png

From: https://www.redhat.com/cms/managed-files/ansible-diagram-3.png


Download

First, you need to download a Red Hat Ansible Tower trial to use it on your own Linux server or cloud instance,  you’ll requested to provide your mail, go to the next link and download the package:  https://www.ansible.com/tower-trial


So, after you download the package, now you can install it but you will need a license file to activate it. As you have shared your mail, Red Hat will send you an automated email to  get your license key. You will need to select a trial option based on the number of machines and features you’ll need. To compare Ansible Tower editions, see www.ansible.com/tower-editions


Basically, you’ll have to choice from:

  • FREE ANSIBLE TOWER TRIAL – ENTERPRISE FEATURES: For enterprise IT operations that require more than 10 nodes
  • FREE ANSIBLE TOWER TRIAL – LIMITED FEATURES UP TO 10 NODES: Self-support trial license that will not expire. Does not include features in Standard and Premium Ansible Tower


In this installation we selected: FREE ANSIBLE TOWER TRIAL – LIMITED FEATURES UP TO 10 NODES.


The license key is a txt file that looks like:

{
    "company_name": "Sentinella", 
    "contact_email": "guillermo@sentinel.la", 
    "contact_name": "Guillermo Alvarado", 
    "hostname": "xxxxxxxxxxxxxxxxxxxxxxxxxx", 
    "instance_count": 10, 
    "license_date": xxxxxxx, 
    "license_key": "xxxxxxxxxxxxxxxxxxxxxxxxxxxxxxxxxxxxxxxxxxxxx", 
    "license_type": "basic", 
    "subscription_name": "Red Hat Ansible Tower, Self-Support (10 Managed Nodes)"
}

You will upload it after the installation is complete.


Installation


You can check the requierements here, But the Supported Operating Systems:

  • Red Hat Enterprise Linux 7.2 or later 64-bit
  • CentOS 7.2 or later 64-bit
  • Ubuntu 14.04 LTS 64-bit
  • Ubuntu 16.04 LTS 64-bit
  • Windows Server 2008 R2 or later

Also the minium specs:

  • 2 CPUs minimum

  • 2 GB RAM minimum (4+ GB RAM recommended)

  • 20 GB of dedicated hard disk space for Tower service nodes

  • 20 GB of dedicated hard disk space for nodes containing a database (150 GB+ recommended)

  • 64-bit support required (kernel and runtime)

We are going to install Tower in a RHEL virtual server:

1. Update the system

# yum update

Note: Reboot the system if the kernel packages were updated


2.Download the package with the instructions already mentioned and extract it. (We downloaded it in /tmp)

# tar xvzf ansible-tower-setup-latest.tar.gz 

# mv /tmp/ ansible-tower-setup-3.2.0/ /opt/ansible-tower-setup-3.2.0/

# cd ansible-tower-setup-3.2.0/

3.Enable repos and install ansible

# yum install http://dl.fedoraproject.org/pub/epel/epel-release-latest-7.noarch.rpm

# sudo subscription-manager repos --enable=rhel-7-server-extras-rpms

# yum install ansible


4.Edit inventory file to put your passwords

# ls /opt/ansible-tower-setup-3.2.0
backup.yml group_vars install.retry install.yml inventory licenses README.md restore.yml roles setup.sh
# vi /opt/ansible-tower-setup-3.2.0/inventory

[tower]
localhost ansible_connection=local

[database]

[all:vars]
admin_password='somepass'

pg_host=''
pg_port=''

pg_database='awx'
pg_username='awx'
pg_password='somepass'

rabbitmq_port=5672
rabbitmq_vhost=tower
rabbitmq_username=tower
rabbitmq_password='somepass'
rabbitmq_cookie=cookiemonster

# Needs to be true for fqdns and ip addresses
rabbitmq_use_long_name=false


5.Install Ansible Tower with setup.sh script

./setup.sh

Activation


After the installation is complete, you need to go to your FQDN or IP in your browser and you’ll see the login page of Ansible Tower, use the password you previosly defined in the inventory file and the user “admin” to log on.


Then, you will be requested for an activation file, just upload it and you are done wtih your Ansible Tower installation.


The next post we are going to setup Ansible Tower to use it, keep tuned!  =)

Share this
28 Sep 2017

Success case: Banco Multiva

Straight from Mexico, Grupo Multiva is a financial group that has more than 30 years in the Mexican market without mergers with foreign banks.

Multiva just launched its cloud platform with Red Hat OpenStack Platform at its center. The Multiva teams like Developers, architects and operators are facing challenges, those who develop, deploy and operate cloud infrastructures must ensure their clouds meet service-level agreements (SLAs). We at Sentinel.la are working very close to ensure that SLA.


We want to share the thougths from the Multiva team :

“Sentinel.la has helped us save time and effort. With their monitoring dashboard we have reduced the MTTD (Mean Time To Detect) by 80% in our OpenStack cloud“ – Juan Alberto Muñoz Vela, Infrastructure Director at Multiva


Here at Sentinel.la, our biggest reason for being fans of Multiva are  their vision to innovate pushing an Open Cloud strategy growing the local talent around OpenStack in Mexico. They shared with us some of the core drivers behind their OpenStack strategy:

  • Hardware Requirements: OpenStack works with standard or commodity hardware, no need for specialized vendor hardware.
  • Marketplace and vendors: As OpenStack users, they have lot of choices: service providers, vendors, system integrators, distributions, trainers, consultants, and so on.


There is no doubt, The market trends and state of the Stack are clear, OpenStack is becoming the platform of choice for private cloud deployments.

Looking forward to contribute in your cloud strategy =)


Share this
31 Mar 2017

Brand new Sentinel.la plugins to control your entire stack


Sentinel.la is a fast way to manage OpenStack, helping you to reduce OpenStack’s learning curve.

Yes, we do love and specialize on OpenStack, but what happens if you need to do more? If you need help making easier your journey as a DevOps, Sysadmin, Developer or a person interested in getting different data about your server or application, well, we were thinking about it, how can we help you? And then the Plugins idea was born.

The plugins are components in python and with them, you can drop some lines of code with python logic (at this moment) to extract server metrics by processes/components. It’s also possible to monitor within a server and transform it into just one piece of data, for example, the number of volumes in a Docker deployment, Ceph health check, is MySQL server running?, etc.. this information will be displayed into the Sentinella App.

In this way, our users just only get and save the information related to their particular needs.


Sentinel.la is seeking not only into bringing you OpenStack, but to also be an efficient tool. We’ve seen OpenStack deployments that use different components like PostgreSQL, RabbitMQ, Apache, etc.. all that being required to be monitored, to get a faster and better troubleshooting.

This is the reason why now you can make your own plugins and share them with the community.


How do plugins work in Sentinel.la?

Sentinel.la takes your metrics and saves this information using our API, all through Sentinella Agent.

Our components are an abstract of the Sentinel.la functionality to adapt new features.


The plugin uses a task in Sentinella Agent to push new metrics and sends to Sentinella API, when arriving at Sentinella API will apply validation to know if is a valid plugin, the next diagram show you the internal workflow.


Sentinel.la has a process to plugin evaluation, this process starts when registering a plugin release.

Is necessary ensure that all Sentinel.la plugins follow the rules, to keep control and quality this is the reason why we have a process to approving but is simple.

  1. Register release.
  2. Evaluatión.
  3. Approve.

The point 2 consists in the review of code, check if the rules have been applied.

What steps do I need to follow to add my plugin into Sentinel.la?

1.- Register Plugin at Sentinella.
2.- Get your plugin_key.
3.- Download the plugin template.
4.- Put your code logic into your plugin, following the specs.
5.- Make a release.
6.- Install plugin into your server with the Sentinella Agent

For more information click here.

Also, you can take other plugins done by Sentinella Community.


What are the rules?

  1.  Plugins must register into Sentinel.la.
  2. Follow the documentation to make Sentinel.la Plugin.
  3. Enjoy.

How do I install a plugin?

Piece of cake:

$ sentinella install <plugin_name> <plugin_version>

How do I configure a plugin?

When the plugin is already installed, open this file /etc/sentinella/sentinella.conf this file has a configuration section for the plugins, it’s one object called plugins.
In this section, you must add your plugin.

Section example:

"plugins": {
        "sentinella.openstack_logs": [
            "get_openstack_events"
        ],
        "sentinella.metrics": [
            "get_server_usage_stats"
        ],
        "sentinella.test": [
            "get_stats"
        ],
        "sentinella.sentinella-docker": [ <----- Name of package
            "docker_stats" <----- Name method.
        ]
    },

If you have any questions about the package name, class name, etc.. you can go to /usr/share/python/sentinella/lib/python2.7/site-packages/sentinella/ here are all installed plugins.

Doubts?

Please, contact us 🙂

Share this
11 Nov 2016

Speeding up your development with docker-compose

Hello, my name is Gloria and now I am part of Sentinel.la as Software engineer. This is my very first post and I want to share with you how we are avoiding inconsistencies between environments to speed up our development process.

As we are a startup every opportunity to save time is priceless. We faced a challlenge: How to stop wasting time trying to run our app in different environments?

Let me put this scenario:

– Guillermo has installed some libraries in our dev environment (A virtual machine) and we are programming an application-specific functionality with something that is only available at these libraries.

– Francisco has installed in our staging machine other libraries, because he is working on another project with other code, but Guillermo wants Francisco to execute the code of his application in that different environment. So, Francisco installs the same librares, or the application will fail either.

This scenario disappears with Docker. To run the application, Guillermo creates a Docker container with the application and all the resources needed, and passes that container to Francisco.

Francisco, having Docker installed, can run the application through the container, without having to install anything else. =)

Docker now allow us to focus on developing our code without worrying about whether that code will work on the machine on which it will run.

“Docker containers wrap a piece of software in a complete filesystem that contains everything needed to run: code, runtime, system tools, system libraries – anything that can be installed on a server. This guarantees that the software will always run the same, regardless of its environment.”

What are the benefits?

– Rapid application deployment.
– Portability.
– Encapsulate apps control version.
– Maintenance.

Is normal that when a new developer take its first task, to have to install all development tools to work on that task, and it’s usual to waste a lot of time trying to do it.

In this case with docker we are solving the portability, preparing an enviroment to work and do it rapidly, that’s why we use containers, to make portable our system. Our team could be able to work on every OS.

How to achieve it?

This is a simple example to start an environment with Flask, InfluxDB, Rabbit MQ and Celery, using docker-compose.

Source code for this part can be found here on Github.

dockercompose

Docker compose is a tool for docker, It allow us to start multiple containers, writing only a script in yaml format to start your environment using containers, so you can link containers, execute commands, build images, etc. and then docker-compose will help us to prepare a complete environment.

Requirements
Docker 
Docker compose

Directory
This is the structure of my project, everything goes inside the “project-one” directory.

directory

entrypoint.sh file
This file executes at container context, inside WORKDIR.

For example in this case execute celery worker for this application and run app.

#!/bin/bash
echo $PWD
ls
celery -A celery worker --loglevel=info
python -u app.py

exec "$@"

Create a Dockerfile

FROM python:2.7
MAINTAINER Gloria Palma "gloria@sentinel.la"
ADD . /app
WORKDIR /app/ 
RUN pip install -r requirements.txt
ENTRYPOINT ["./entrypoint.sh"]

Create a docker-compose.yml

version: "2"
services:
   db:
     image: postgres
     environment:
       - POSTGRES_USER=admin
       - POSTGRES_PASSWORD=admin
   rabbitmq:
     image: rabbitmq:3.5.3-management
     ports:
       - "8080:15672"  # management port (guest:guest)
       - "5672:5672"   # amqp port
       - "25672:25672" # cluster port
     environment:
       - RABBITMQ_NODENAME=rabbit
       - RABBITMQ_DEFAULT_USER=admin
       - RABBITMQ_DEFAULT_PASS=admin
   influxdb:
     image: tutum/influxdb:latest
     container_name: influxdb
     environment:
       - ADMIN_USER=admin
       - INFLUXDB_INIT_PWD=admin
       - PRE_CREATE_DB=sentinella
     ports:
       - "8083:8083"
       - "8086:8086"
       - "8090:8090"
   api:
     build:
      context: .
      dockerfile: Dockerfile
     ports:
       - "5000:5000"
     depends_on:
       - db
       - rabbitmq
       - influxdb
     links:
       -  db:db
       -  rabbitmq:amq
       -  influxdb:influx

Run, build and ship

Dockerfile is a script for create a custom image, is necessary fisrt build the image when use docker-compose for build image run this command :

$ docker-compose build

For  run containers:
$ docker-compose up

docker inspect for look for the ip

$ docker inspect name-of-container
we can see the ip on the Network section.

Open you browser and see your app running, in my case it’s a simple flask app.

Source code for this part can be found here on Github.

Conclusion

Containers are a fast solution to mount development environments. Whenever there’s no need to use these environments, then you can destroy them and build them again later.

Share this
04 Nov 2016

How we built Sentinel.la (II) – AngularJS and Netlify

“Apollo” is the codename of our UI. It was built with AngularJS because we wanted a single-page application (SPA). This is how it looks like:

captura-de-pantalla-de-2016-11-03-12-51-01


AngularJS and Single-Page Apps.

An SPA ( Single-Page Apps) is a web application (or a website) that fits into a single page in order to give a more seamless experience to users, like a desktop application. Single Page Applications are becoming more popular for a good reason. SPAs can provide an experience that feels almost like a native app in the web, instead of sending a full page of markup, you can send a payload of data and then turn it into markup at the client side.

We decided to build an hybrid SPA. By hybrid I mean that, instead of treating the entire application as a single page application, we divide it into logical units of work or paths through the system. You end up with certain areas that result in a full page refresh, but the key interactions of a module take place in the same page without refreshing.  For example, administration might be one “mini” SPA app while configuration is another.

Another advantage of AngularJS is that it uses the MVC approach, which is familiar to developers who have used Django or another MVC web development framework. Angular implements MVC by asking you to split your app into MVC components, then Angular manages those components for you and also serves as the pipeline that connects them.

Another advantage is that it puts the DOM manipulations where they belong. Traditionally, the view modifies the DOM to present data and manipulates the DOM (or invokes jQuery) to add behavior. With Angular, DOM manipulation code should be inside directives and not in the view. Angular takes the view just as another HTML page with placeholders for data.

Every SPA needs an API to consume. We built an API with Flask, that I’ll be reviewing in further posts,


real_angular_flask__


Do not handle webservers, JAM Stack and Netlify.

Once we finished the UI and the API, we launched it over an nginx web servers farm. Also we decided to use a CDN to improve user experience in terms of speed and also to help us prevent site crashes in the event of traffic usage peaks. So, in this case, the CDN would help us to distribute bandwidth across multiple servers, instead of having to use just one server handling all the traffic.

While searching the internet looking for a good and affordable CDN we discovered Netlify and the JAMStack.

“JAM stands for JavaScript, APIs and Markup. It’s the fastest growing stack for building websites and apps: no more servers, host all your front-end on a CDN and use APIs for any moving parts[…] The JAMstack uses markup languages like HTML, CSS and Markdown to format and style our content, client-side Javascript to make it interactive and engaging and APIs to add persistence, real-time sync, real-world interactions, comments, shopping carts, and so on.“ – https://jamstack.org/

“Netlify is a unified platform that automates your code to create high-performant, easily maintainable sites and web apps” . – https://www.netlify.com/


captura-de-pantalla-de-2016-11-03-12-50-03


So, we decided to use Netlify. It allow us to bring an automated platform to deploy our AngularJS app, because it follows the JAMStack, and also provide us with the best practices like CDN distribution, caching and continuous deployment with a single click – or command. That means not handling webservers, therefore less effort and work. For a startup like us that’s very valuable.

With Netlify we just push our site to their CDN because it pairs naturally with Git. That’s why you only need to pull, change and push the code to manage your site. After a git push, the newest version is immediately available everywhere and with their integrations you can set up any number of outbound webhooks so you can receive an e-mail or Slack notifications to notify for deploy information or build failures.

Netlify has a lot of features like DDoS protection, Snapshots, Versioning & Rollbacks, Instant Cache Invalidation, DNS Hosting, Domain Registration, etc. You can check more Netlify features here: https://www.netlify.com/features/

In the next post I’ll review the API and the AMQP topics about how we built our Software. Stay tuned.

Share this
13 Oct 2016

How build a SaaS around OpenStack (I)

How does Sentinelle Labs build apps?  What pieces interact in our platform in order to successfully capture and process agent’s data to monitor, backtrace and send notifications if something goes wrong in an OpenStack deployment?

We’ve decided that it’s time to share more details around this topic. In this series, we’ll describe our architecture and technologies used to go from source code to a deployed service to show you how your OpenStack deployment is working. You can expect this to be the first of many posts detailing the architecture and the challenges of building and deploying a SaaS to enhance OpenStack skills,  reduce OpenStack learning curve  and Backtrace it much faster. Sentinel.la is a fastest way to OpenStack.


High level design

The High-level design (HLD) explains the architecture used for developing a software product. The architecture diagram provides an overview of the entire system, identifying the main components that will be developed for the product along with their interfaces.

sentinella-hld-001


Decoupled architecture

As you can see, we’ve used a decoupled architecture approach. This is a type of architecture that enables components/ layers to execute independently so they can interact with each other using well-defined interfaces rather than depending tightly on each other.


API

The first step in order to address a decoupled architecture is to build an API. There’s nothing more important than the application program interface to link components with each other. Our API is called “Medusa” and is built with Flask. An API is a great way to expose an application’s functionality to external applications in a safe and secure way. In our case that external app is “Apollo”, our UI, which will be reviewed later.


MQ

Sentinel.la uses a Message queuing system (in this case RabbitMQ). The MQ acts as middleware that allows the software to communicate the different layers/pieces that are being used. The systems can remain completely autonomous and unaware of each other. Instead of building one large application, it’s a better practice to decouple different parts of your application and only communicate between them asynchronously with messages.

We use Celery, a task queue with batteries included written in Python to manage our queue, as I mentioned above, our broker is RabbitMQ and also it does manage the workers that consume all the tasks/messages.


UI

Our UI is called “Apollo”. It’s built in AngularJS, and is an ”API-Centric” Web Application. Basically, it executes all its functionalities through API calls. For example, to log in a user, we send its credentials to the API, and then the API will return a result indicating if the user provided the correct user-password combination. Also we are following the JAM stack conventions. JAM stack is an ideal way of building static websites, in later posts we’ll explain it but the basic idea is that JAM, that stands for JavaScript, APIs and Markup, is to avoid managing servers, but to host all your front-end over a CDN and use APIs for any moving parts.


Datastore

Behind scenes, all data is stored in 4 different databases. We use InfluxDB, a scalable datastore for metrics, events, and real-time analytics. Also we use Rethinkdb the open-source database for the realtime web. One of the components that we use also need MongoDB, an open source database that uses a document-oriented data model. Our relational database is PostgreSQL, an open source relational database management system (DBMS).


Agents

Our platform uses all the information generated on the differents OpenStack. To address that we’ve built an agent 100% written in python (available at https://github.com/Sentinel-la/sentinella-agent/). In order to install it, there are .deb for Ubuntu/Debian and .rpm for RedHat/CentOS packages. Also we have a pip package to install it in SuSE https://pypi.org/project/sentinella/


Data processing engines

To evaluate all the thresholds we developed 2 different daemons, one for InfluxDB (called “Chronos”) and another one for RethinkDB (called “Aeolus”). These pieces have all the rules and logic to rise an alert when something wrong is detected.


Alerta.io

Obviously we need a component that manages all the alerts risen by Chronos and Aeolus. We are proudly using Alerta.io to consolidate all the alerts an also perform de-duplication, simple correlation and trigger the notifications.


Notifications delivery

We send 3 different types of notifications for an alert. First, we send an email (we use Mandrill, the transactional email as a service from Mailchimp). We’ve decided not to maintain an SMTP server. Second, we send slack alerts using their webhooks integrations. Third, of course, we notificate users on Sentinel.la Dashboard pushing alerts to Apollo. In order to accomplish that we use Thunderpush, a Tornado and SockJS based push service. It provides a Beaconpush inspired HTTP API and client.

So far, these are the main components that work together in order to deliver Sentinel.la service. In further posts we’ll do a deeper review of all of them. Next post will be about Apollo, our UI, and the JAM stack.

Thanks for reading, your comments are very welcome.

Share this
31 Aug 2016

Job Opportunity! We are looking for a Software engineer: tools and infrastructure

Sentinelle Labs is a Latin American Startup with an innovative culture, for us the most  important thing is to put us on the shirt of our customers while creating great things, taking  care of the team and to be profitable. We’re a small and exponential team, therefore you won’t be just one more employee, you’re going to have the opportunity to leave your mark here. We love Linux and Open source and we also love home office. Our main efforts are focused at working with OpenStack and Ceph. We build SaaS, our stack is composed mainly of Python and Javascript and we deploy them on cloud technologies and containers platforms like Docker and Kubernetes.

In this position one of your main responsibilities will be to design and develop new features for https://www.sentinel.la our flagship product. You’ll also be responsible for deploying and supporting the platform with its components.

What are we looking for?

The first thing we want is a connection. We want to know about your dreams and to know if you are aligned with our values. If this happens, these are the requirements:

  • Being a person with self-learning ability.
  • Fluent English, ability to engage in conversation.
  • Experience as developer with a medium / high level both frontend and backend.
  • Experience with Python and JavaScript.
  • Medium / high knowledge level on Linux: Ubuntu / RedHat / CentOS
  • Experience in creation and consumption of RESTful APIs, knowledge on Git and MySQL / NoSQL administration.

What we offer?

The first thing is a job position that you’ll be passionate about using cutting-edge technologies while having the opportunity to make decisions to set the course of the platform, and for that as a compensation we offer:

  • Salary according to skills
  • Medical Insurance
  • Home Office
  • Phone Internet plan
  • Home Internet plan

If you are interested in working with us send your resume to guillermo@sentinel.la

Share this
09 Aug 2016

Sentinel.la now available at PyPI

We are glad to announce that the sentinel.la agent is now available at Python Package Index (PyPI)  the official third-party software repository for Python. https://pypi.python.org/pypi/sentinella

PyPI primarily hosts Python packages in the form of archives known as Python Eggs. Similarly to JAR archives in Java – Eggs are fundamentally ZIP files, but with the .egg extension, that contains the Python code for the package itself, and a setup.py file that holds the package’s metadata.

You can access to PyPI with several package managers, includings EasyInstall, PyPM and pip that use Pypi as the default source for packages and their dependencies.

So you will be able to install the sentinel.la agent with pip as following:

guillermo@xps13:~/$ pip install sentinella

With this, Sentinel.la is available for:


Also, remember to vote for our presentation to OpenStack Summit at Barcelona:


Captura de pantalla de 2016-08-09 17-22-56

Vote here:  Double Win! Helping to consolidate OpenStack implementations (and build a Startup in the meantime)

Keep in touch with us while we’re building the next big thing,

Email: hello@sentinel.la


Share this
23 Apr 2016

Keep Austin Nerd! We’re in, are you? #OpenStackSummit

IMAG0141 (1)


The Openstack Summit is attended by thousands of people from the whole world. This time the thirteenth release of OpenStack, codenamed Mitaka is ready.  This version has improved user experience, manageability, and scalability.  To see the whole agenda: https://www.openstack.org/summit/austin-2016/summit-schedule#day=2016-04-25

In the OpenStack Summit you will plan your cloud strategy and hear about market opportunities, latest products, tools and services like Sentinel.la, from the OpenStack ecosystem. We are ready to learn about operational experience directly from users.

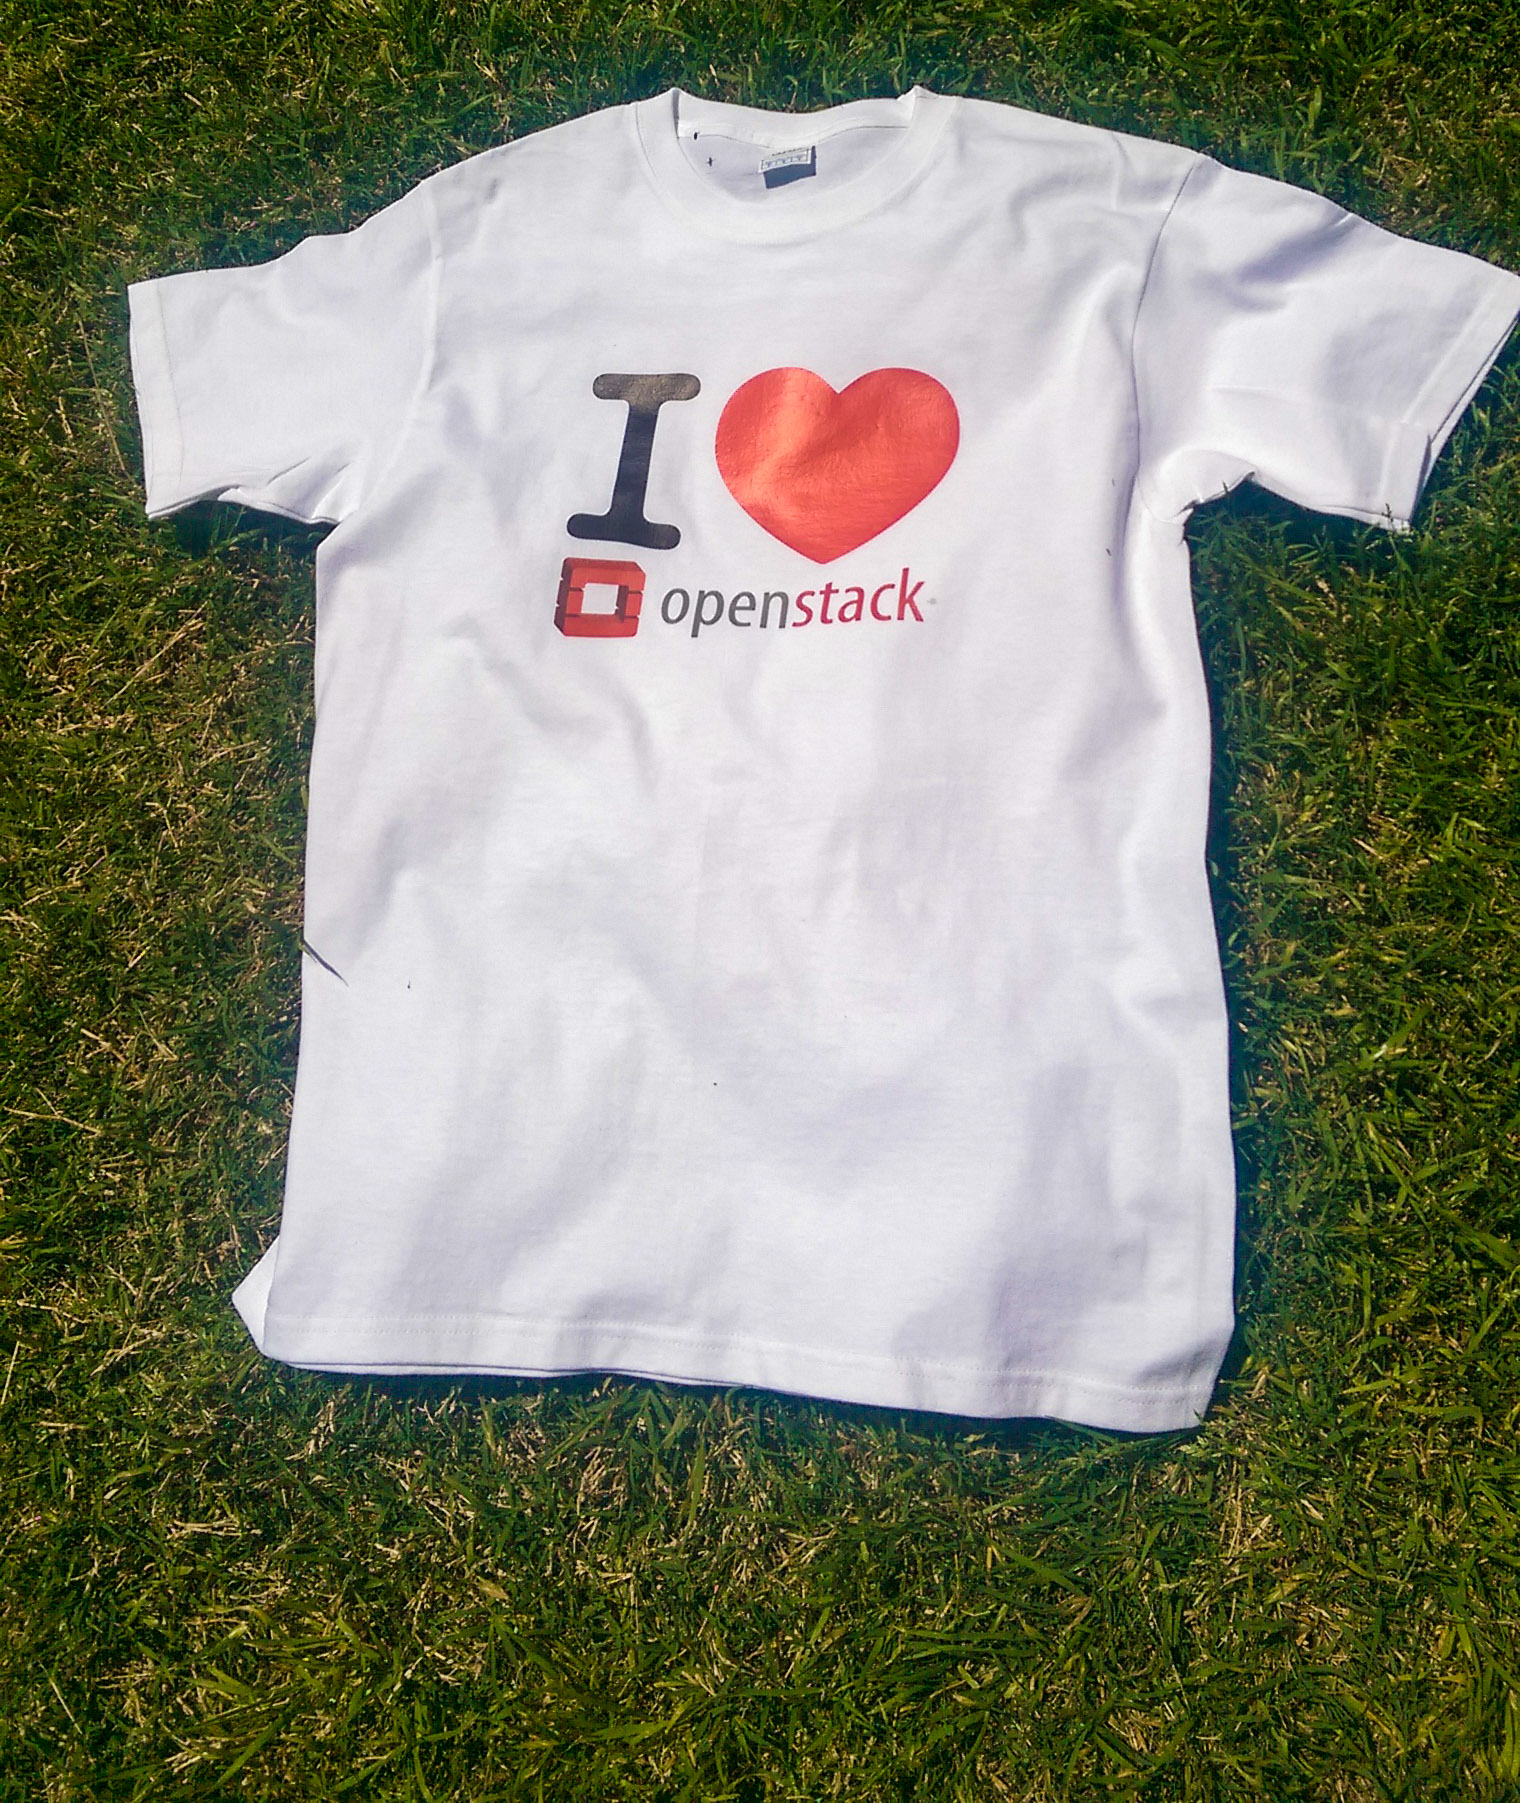
So, our team will be attending the OpensStack Summit with this  t-shirts, do you like it?  what about getting one?

IMAG0139 (1)


Please just send us a tweet to @The_sentinella to obtain a t-shiirt and a sticker and meet us at the event, we’ll be attending sessions and being around the Marketplace. See you at the Openstack Summit!

Share this
20 Feb 2016

Sentinel.la Agent: opensource leverages security

The best way to show off our commitment with the opensource community is using it into every day activities. Sentinel.la agent is based on tourbillon. We’ve forked this project and begun to customize to our purpose.

You have access to the agent’s code to verify that it’s absolutely safe to install and run. Most of the monitoring tool’s agents work over a binary file no bringing enough information of what exactly is doing on your system (or your information). Also this agent run with a user named sentinella (group sentinella) with limited access to your system and files.

Agent installation

Get the agent from out site and get this up using “sentinella init” command. It will be available via debian (.deb) or centos (.rpm) package. Install it as local for now. We’ve got into a repo soon. You will need to identify your account ID (get that key number directly from the console as the next picture shows).sentinel.la openstack monitoring healthcheck service nova neutron heat cinder ceilometer.001Run this agent at any OpenStack node located in any of your instances or datacenters.

root@sf-openstack01:/tmp# sentinella init
Configure Sentinel.la agent
Enter your Account Key []: 32j4u23iy4u23i

Later you will be asked what OpenStack services you will monitor as the following:

OpenStack configuration

Monitor nova-api? [yes]:
Name of the nova-api process [nova-api]:
nova-api log file [/var/log/nova/nova-api.log]:

Monitor nova-scheduler? [yes]:
Name of the nova-scheduler process [nova-scheduler]:
nova-scheduler log file [/var/log/nova/nova-scheduler.log]:

Monitor nova-compute? [yes]:
Name of the nova-compute process [nova-compute]:
nova-compute log file [/var/log/nova/nova-compute.log]:

Monitor nova-cert? [yes]: n

Monitor nova-conductor? [yes]: n

Monitor nova-novncproxy? [yes]: n

Monitor neutron-server? [yes]:
Name of the neutron-server process [neutron-server]:
neutron-server log file [/var/log/neutron/server.log]:

Monitor neutron-dhcp-agent? [yes]:
Name of the neutron-dhcp-agent process [neutron-dhcp-agent]:
neutron-dhcp-agent log file [/var/log/neutron/dhcp-agent.log]:

Monitor neutron-openvswitch-agent? [yes]:
Name of the neutron-openvswitch-agent process [neutron-openvswitch-agent]:
neutron-openvswitch-agent log file [/var/log/neutron/openvswitch-agent.log]:

Monitor neutron-l3-agent? [yes]:
Name of the neutron-openvswitch-agent process [neutron-openvswitch-agent]:
neutron-l3-agent log file [/var/log/neutron/l3-agent.log]:

Monitor neutron-metadata-agent? [yes]:
Name of the neutron-metadata-agent process [neutron-metadata-agent]:
neutron-metadata-agent log file [/var/log/neutron/metadata-agent.log ]:

configuration file generated


We have plans to make this agent detect services automatically, and ask only for what you are actually running on the server.


Setinel.la agent will create a configuration file in JSN format with the information you’ve just chosen.


root@sf-openstack01:/etc/sentinella# cat sentinella.conf
{
    "nova-novncproxy": false, 
    "log_level": "INFO", 
    "neutron-metadata-agent": {
        "process": "neutron-metadata-agent", 
        "log": "/var/log/neutron/metadata-agent.log "
    }, 
    "nova-compute": {
        "process": "nova-compute", 
        "log": "/var/log/nova/nova-compute.log"
    }, 
    "nova-conductor": false, 
    "nova-api": {
        "process": "nova-api", 
        "log": "/var/log/nova/nova-api.log"
    }, 
    "neutron-openvswitch-agent": {
        "process": "neutron-openvswitch-agent", 
        "log": "/var/log/neutron/openvswitch-agent.log"
    }, 
    "account_key": "32j4u23iy4u23i", 
    "neutron-l3-agent": {
        "process": "neutron-openvswitch-agent", 
        "log": "/var/log/neutron/l3-agent.log"
    }, 
    "neutron-dhcp-agent": {
        "process": "neutron-dhcp-agent", 
        "log": "/var/log/neutron/dhcp-agent.log"
    }, 
    "nova-scheduler": {
        "process": "nova-scheduler", 
        "log": "/var/log/nova/nova-scheduler.log"
    }, 
    "neutron-server": {
        "process": "neutron-server", 
        "log": "/var/log/neutron/server.log"
    }, 
    "nova-cert": false, 
    "log_format": "", 
    "log_file": "/var/log/sentinella/sentinella1.log", 
    "plugins_conf_dir": "/etc/sentinella"
}


Configuration file can be copy out other nodes with no issues related to use a different server name or system settings. It would speed up its roll out among geographically dispersed instances.


The agent counts on different options to get a better experience. Sentinel.la will add more features and service through the plug-in concept adopted from tourbillon project. That will be easier to add or remove future services or even develop services on your own for other apps.


root@sf-openstack01:~# sentinella
Usage: sentinella [OPTIONS] COMMAND [ARGS]...

sentinella: send metrics to API

Options:
--version                     Show the version and exit.
-c, --config <config_file>    specify a different config file
-p, --pidfile <pidfile_file>  specify a different pidfile file
--help                        Show this message and exit.

Commands:
clear      remove all plugins from configuration
disable    disable one or more plugins
enable     enable one or more plugins
init       initialize the tourbillon configuration
install    install tourbillon plugin
list       list available tourbillon plugins
reinstall  reinstall tourbillon plugin
run        run the agent
show       show the list of enabled plugins
upgrade    upgrade tourbillon plugin
root@sf-openstack01:~# sentinella show
no enabled plugins


Don’t forget to collaborate.

Share this

All rights reserved© 2017 Sentinelle Labs.  Terms and conditions | Privacy Policy

Click Me